For the past term, my class and I have been creating many different things such as a boomerang and a Tool holder.
What I learnt while working on both tasks.
I have learnt to design my own shapes and how to properly sand a piece of wood down to the size that I need. I have learnt that I need to work more productively and quicker. I have learnt that I need to try to get my work finished to the expectations of my teacher not to what I think it should be.
Friday, 31 May 2019
Thursday, 30 May 2019
Making Salts 2
Aim: To produce copper sulfate salt by reaching copper plus a with an acid.
Method:
1. Add 20ml of sulfuric acid to a 100ml Brauer. Heat the acid until it reaches 70°c. Turn off your bunsen burner.
2. Once heated, use a spatula to add pea-sized portions or copper oxide to the basket. Stir the mixture for 30 seconds.
3. Repeat step 2 until no more will dissolve. Allow the beaker to cool.
4. Fold the filter paper and place it in the funnel. Place the filter funnel into the second Beaker.
5. Make sure the Beaker is cool enough to hold at the top. The contents should still be hot.
6. Gently swirl the contents of the Beaker to mix, and then pour into the filter paper in the funnel. Allow to filter through.
7. Rinse the Beaker you used to heat the mixture previously, and place it back on top of your tripod filled with 50-60ml of water.
8. Place the evaporating basin on top of the Beaker and carefully pour some of the solutions from the Beaker into the evaporating basin.
9. Gently heat the Beaker until the solution in the evaporating basin has reduced by half.
10. leave the evaporating basin to cool. Once cool, move the evaporating basin to a warm place where it will no be disturbed (I.e a window-sill) and observe over the next few days. Blue copper sulfate crystals should form.
Results:

Results:

Conclusion:
We mix everything like we were told to and ours came out as the best in the class with very good results.
Tuesday, 28 May 2019
Making Indicators
Aim: To make acid-base indicators using everyday substances.
Method:
Chop the beetroot into small pieces until you have enough to fill 2 cups.
Place the beetroot in a large beaker and add water to cover the beetroot.
Boil over Bunsen burner for at least ten minutes for the colour to leach out of the beetroot.
Filter out the plant material to obtain a red-purple-bluish coloured liquid. This liquid is at about pH 7, (The exact colour you get depends on the pH of the water)
place in a small beaker and leave to one side.
Results:
Beetroot: (Yellow/Red) (Yellow)
Cabbage: (Red/Pink) (Green)
Tea: (Yellow) (Yellow)
Tumeric: (Yellow) (Red/Orange)
Cranberry: (Pink) (Green)
Discussion: We went through the process of adding different chemicals to our everyday substance indicators and each chemical changed to show us if it was a strong base, weak base or strong acid and weak acid by colour changing.
Conclusion: We made our indicators to show what chemicals are acids and bases. I think that beetroot worked better.
Monday, 27 May 2019
S.E.X.X.Y Paragraph English Group.

Statement (of what's going on in the shot and what it is)
Example (of what is going on in the shot)
eXplain (the director's purpose)
eXplain (the effect on the audience)
Your link (to something else to do with the aspect)
In this scene, the long shot is used by the director to show the Afrikaner guard as he approaches Geel Piet.
In the long shot, we see Geel Piet as he exits Doc’s jail cell with the bucket of tobacco leaves, as well as the
guard staring him down from a distance before he confronts him. John Avildsen, the director, used this shot
to establish something, in the scene we also see two smaller prisoners sitting aside, and while Geel Piet
stands up and stands up to Sergeant Borman, he gets beaten back down to the same level these prisoners,
who have surrendered themselves to the authority of the Afrikaners by sitting down. As Sergeant Borman
stands to confront Geel Piet, he has a baton in his hand, the effect this has on the audience is that this
incites the thought of incoming violence towards Geel Piet or the prisoners in the approaching scenes or
shots. This aspect can be contrasted to another scene in which the long shot is used to show P.K as he
leaves his mother to attend a boarding school.
I work with Jess on this S.E.X.X.Y Paragraph.
S.E.X.X.Y Paragraph For English.

In this close up shot we see Geel Piet being interrogated by Sergent Borman. From the position of the camera, we can see Sergent Borman showing his dominance and power over Geel Piet. As we see Geel Piet is Being strangled by Sergent Borman. Avildsen did this to show us how aggressive and overpowering the guards are to the prisoners this made the audience feel upset, disheartened and worried what Sergent Borman will do to Geel Piet. This can be compared to the scene where Sergent Borman beats Geel piet when he grabs the bucket from beside P.K's piano because Sergent Borman is showing the same overpowering dominance that he shows in the other scene.
Thursday, 16 May 2019
Drill Gauge Work
Drill Gauge.
Last term we created a drill gauge to measure the size of drills.
The tools we used are Micrometer, Vernier Caliper, Engineer Square, scribe, 300mm rule, Centre punch, Hammer and Odd leg caliper.
Drill Gauge:
A drill gauge is a flat piece of material used to measure the size of a drill that we need so that we can make the right drills into the right material.

Marking out:
Marking out for the marking I had to use scribe and a square to mark out the lines to drill the holes.

Filing:
On my drill gauge, I used a file.

Micrometer:
We had to use a micrometer to measure the right drill size.
How to use a Micrometer.
1. Move the Thimble to the fully unlocked position.
2. Place your work in between the Spindle and the Anvil.
3. Move the Thimble with the ratchet stop so that it moves till it clicks.
4. Read the Sleeve with Vernier Graduations to find your measurements.

Vernier:
We had to use a vernier to measure the drill gauge and we will use it to measure a stock material to the correct size.
How to use Vernier gauge:
- Unscrew the small screw on the movable slide.
- Slide the slide out until your material fits in the gap.
- Push the slide until it won't move anymore.
- Read the numbers on the under part so you now know what length your material is.

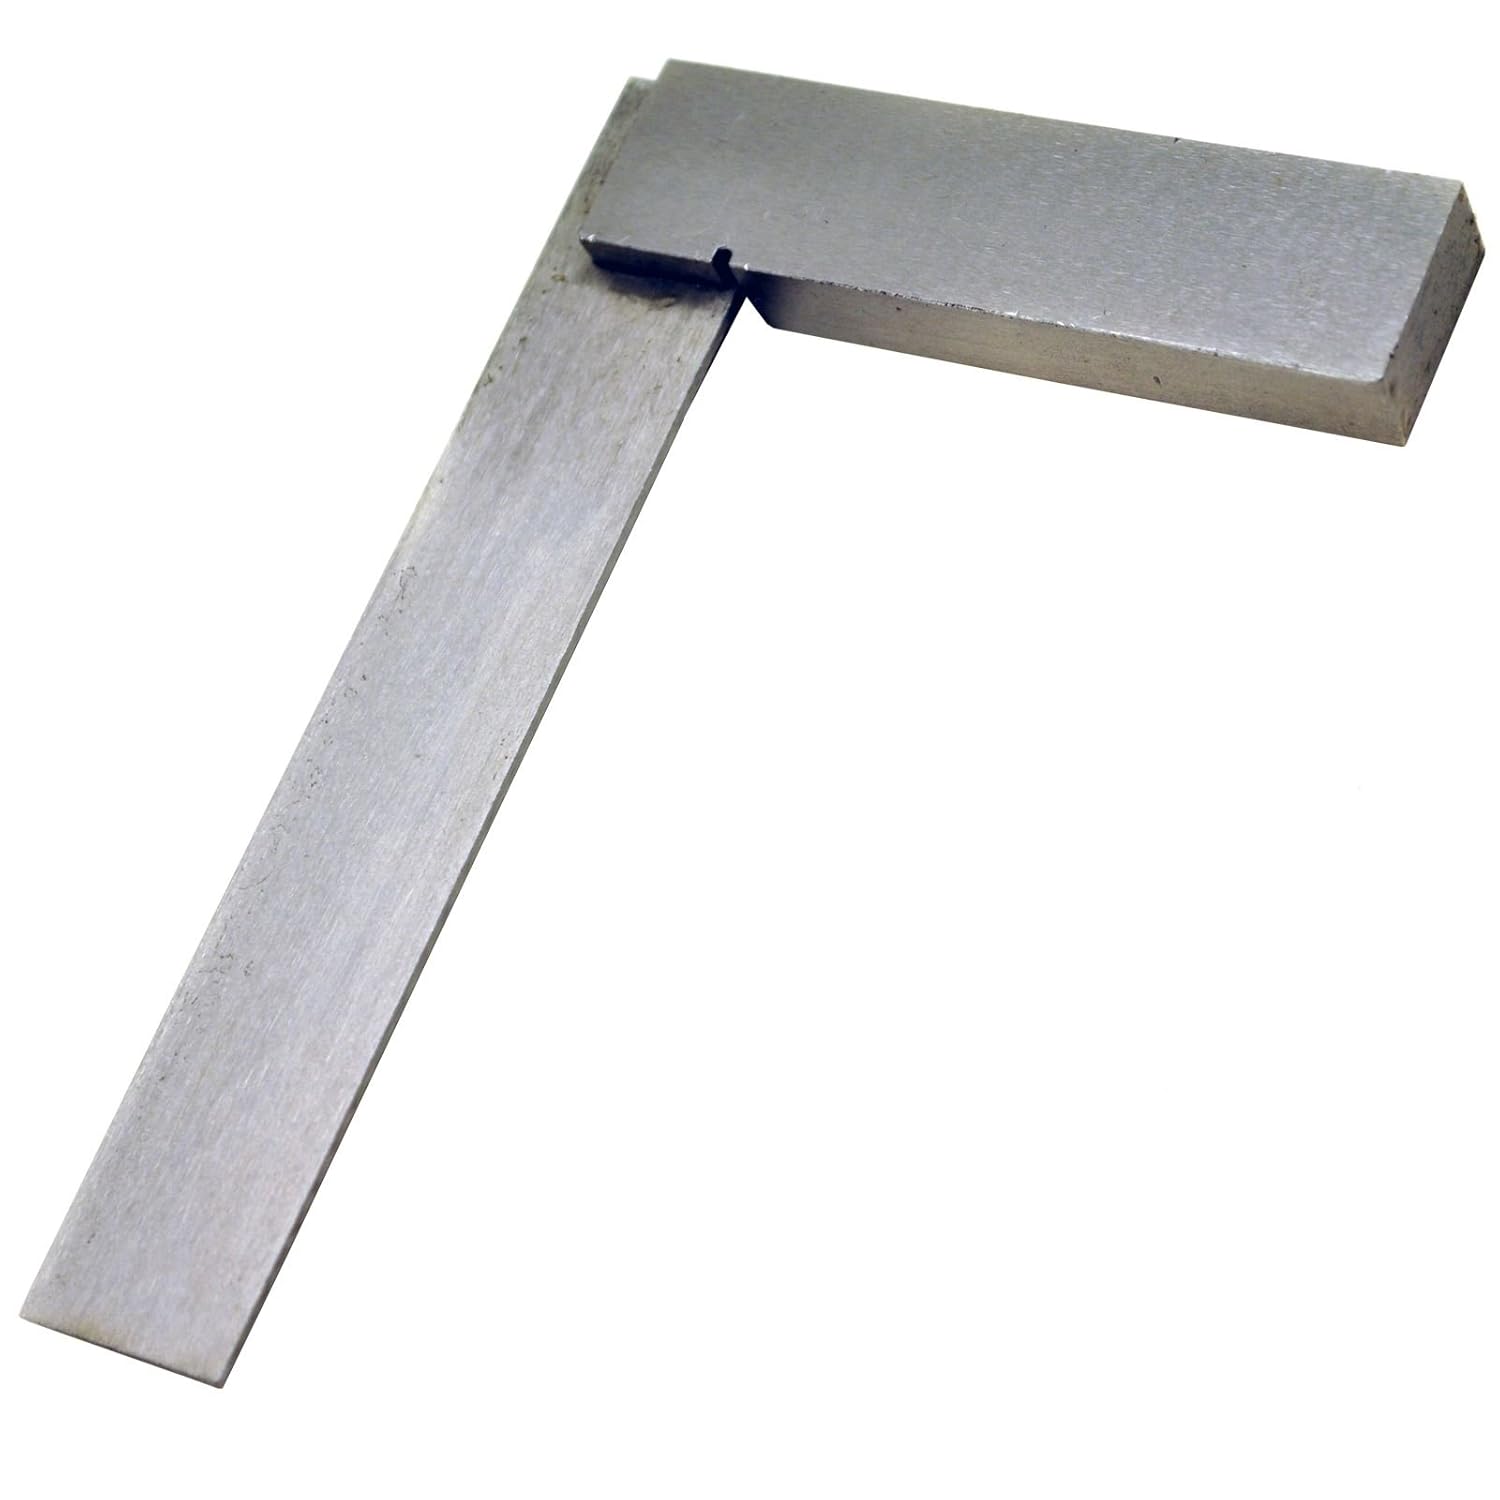
Engineers square:
A engineers square is to help mark out the lines.
Drill press:
The drill press is the most important thing in the workshop because it drills everything we need it to. 
- the handful
- drill bit
- the speed and feeds
- the platform
Centre Punch:
The center punch tool is used to create a minor pilot hole so that your drill can find where you need it to drill.
The center punch tool is used to create a minor pilot hole so that your drill can find where you need it to drill.

Punch numbers:

This Tool is used to mark out numbers onto your work.
Hammer:
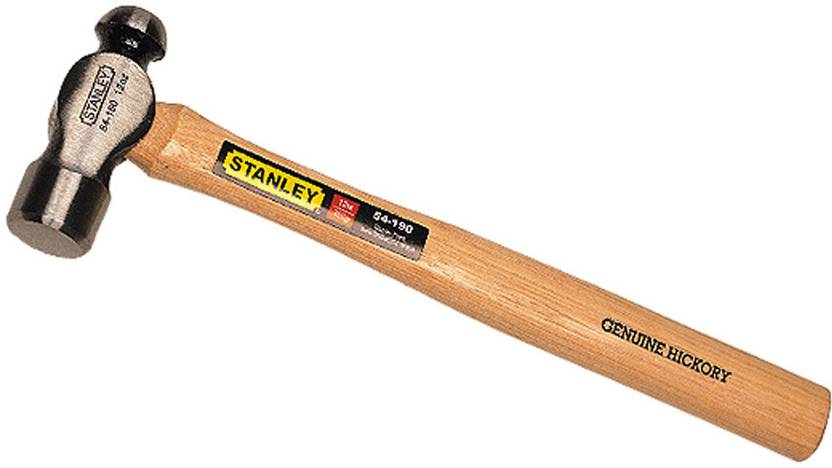
A hammer is a handheld tool used to strike another object. It consists of a handle to which is attached a heavy head, usually made of metal, with one or more striking surfaces. There are dozens of different types of hammers. The most common is a claw hammer, which is used to drive and pull nails.
What I have learned.
I have learned to clean up my work to a state where I can paint it. I have learned how to use a micrometer and vernier to measure my work for drill spots and scribe locations.
What I found difficult.
I found it difficult to get all of my tasks done on time and to the quality I needed it to be at.
I found it difficult to get all of my tasks done on time and to the quality I needed it to be at.
How I got over these Difficulties
I got over these difficulties by trying harder and making my work better and make changes to my style of working.
Wednesday, 15 May 2019
P.E Blog
We have been set the task of rating ourselfs and creating a blog about it.
1. rate ourselfs out of ten on how well we participated in our last lesson.
I rate myself at 5/10
2. 3 reasons on why I rated myself.
I was trying to do my best but I didn't wanna be doing the drills.
I was sometimes not participating in the drills.
I stopped trying half way through.
3. What skills do I think I think I did well.
I did well in passing,dribbling, and trying my best.
4.What skills did I use to pass and dribble the ball.
pointing my body and stick towards the direction I wanted the ball to go to.
I held my stick in the correct way.
5.What do I think I need to involve on in today's lesson.
I need to improve on my body position.
I could try to aim with my body and not just my feet.
I could try always putting my body in the direction I need the ball to go in.
Subscribe to:
Comments (Atom)